How to integrate Konduto
The goal of this manual is to help you understand how to integrate Konduto with DEUNA. Before you begin, you need to complete the following steps to certify your account and credentials.
Benefits
- You will be able to use Konduto antifraud provider with Deuna
Konduto and DEUNA Certification Process in Test Environment
Requirements
- API test credentials:
- Public Key
- Secret Key
- Dashboard test access
- password
Setup Konduto’s Dashboard
-
Enter to https://app.konduto.com/
-
Input Dashboard credentials
-
Review your API Keys
-
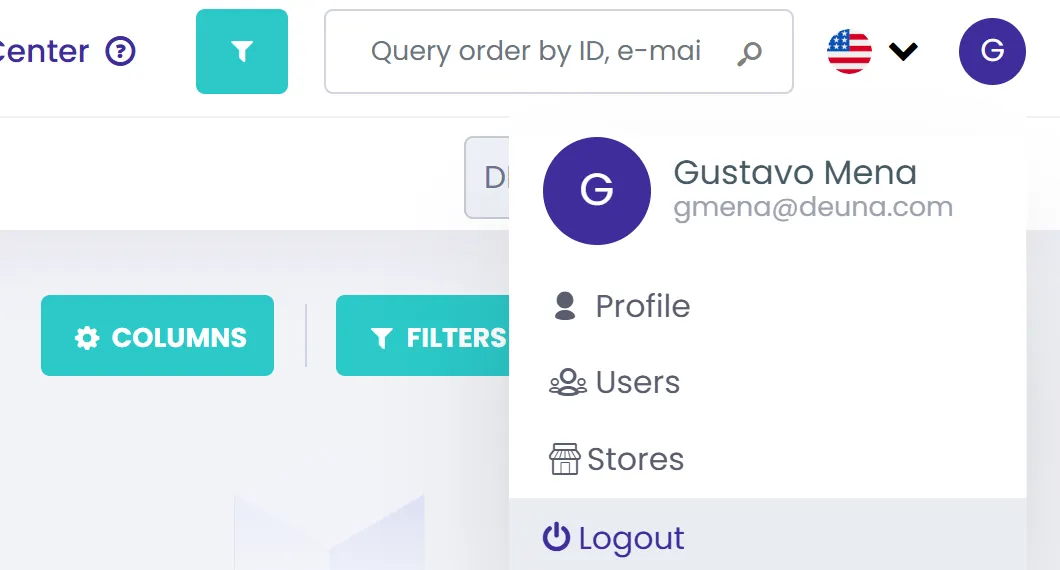
Select “Stores” under the user icon
-
Select the “Edit” button from your Store (should have been created by your Konduto’s KAM)

-
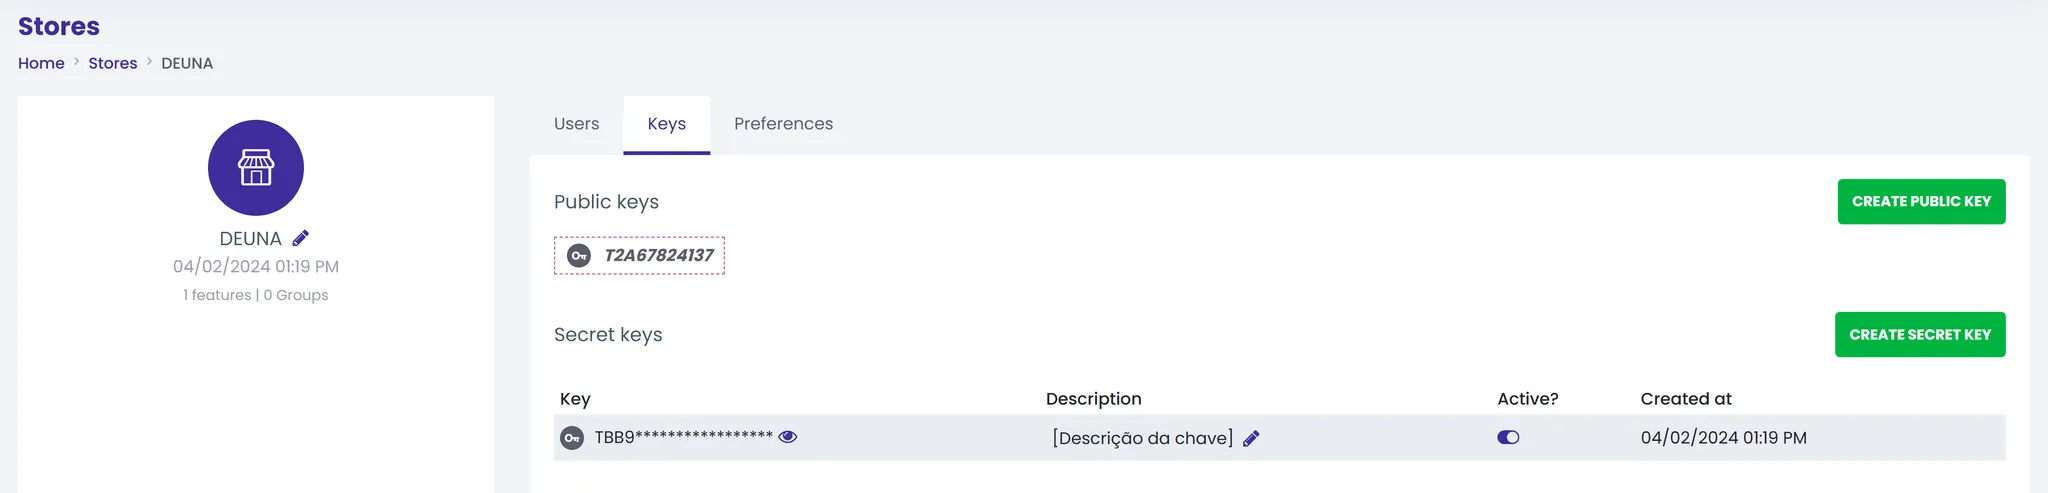
Select “Keys”
-
-
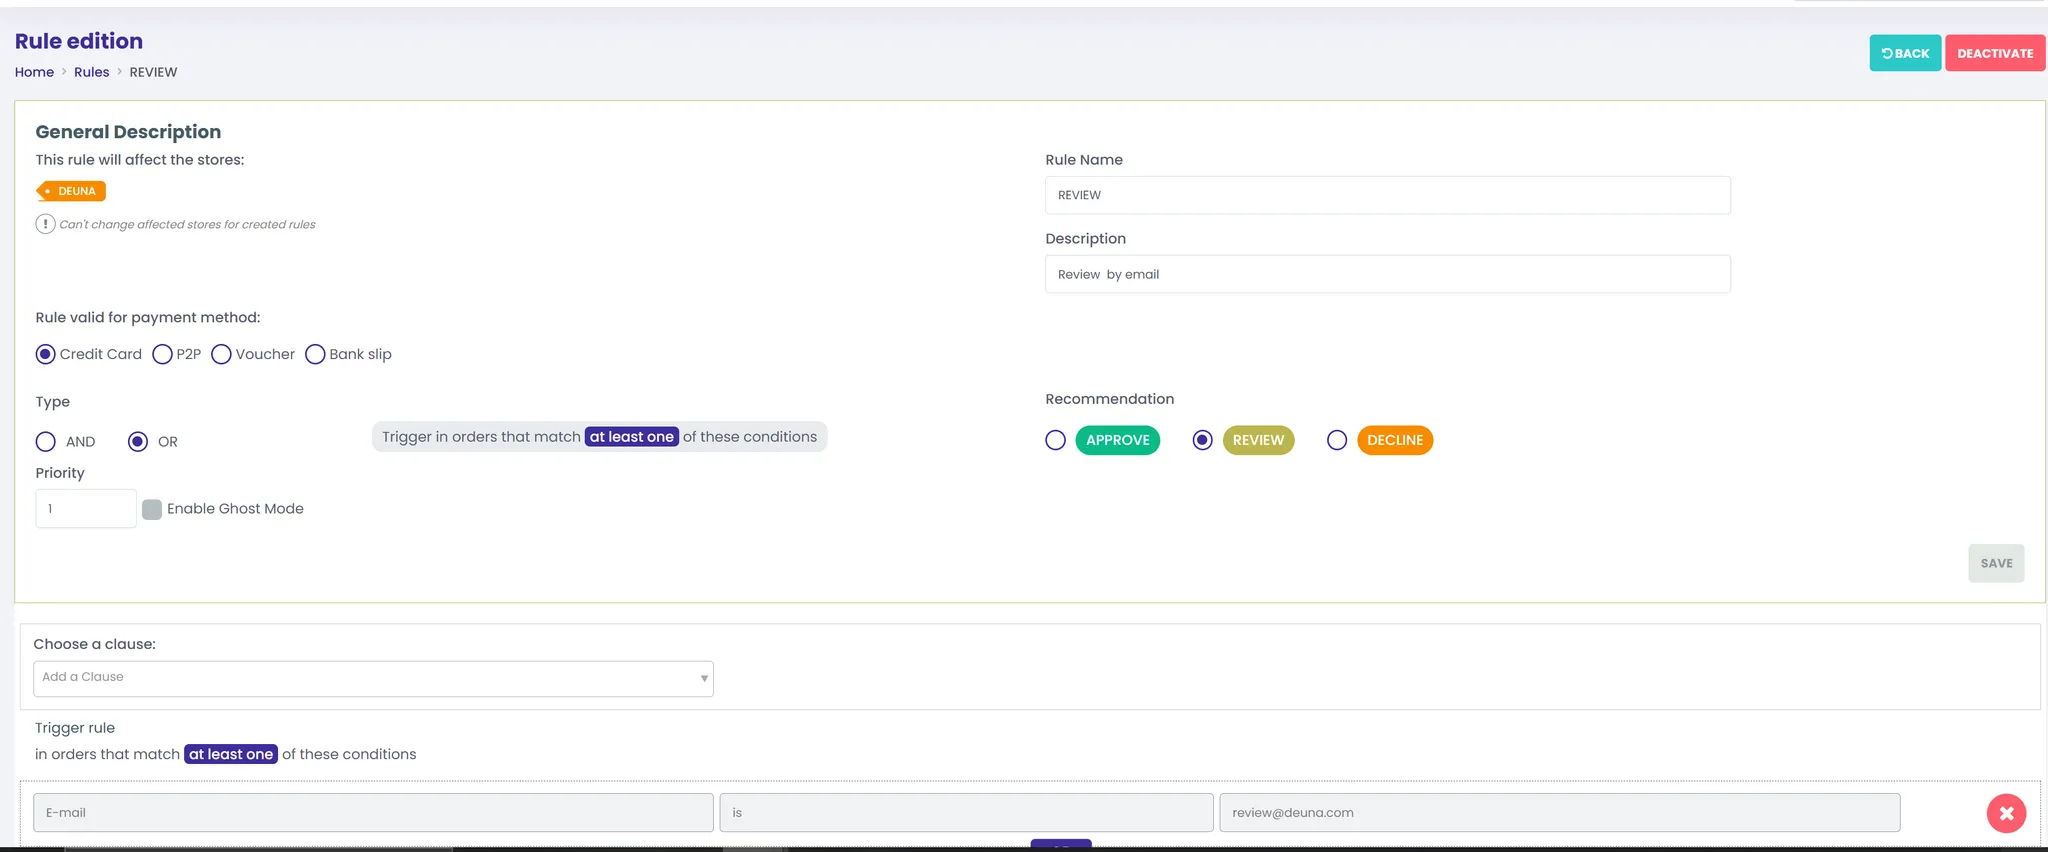
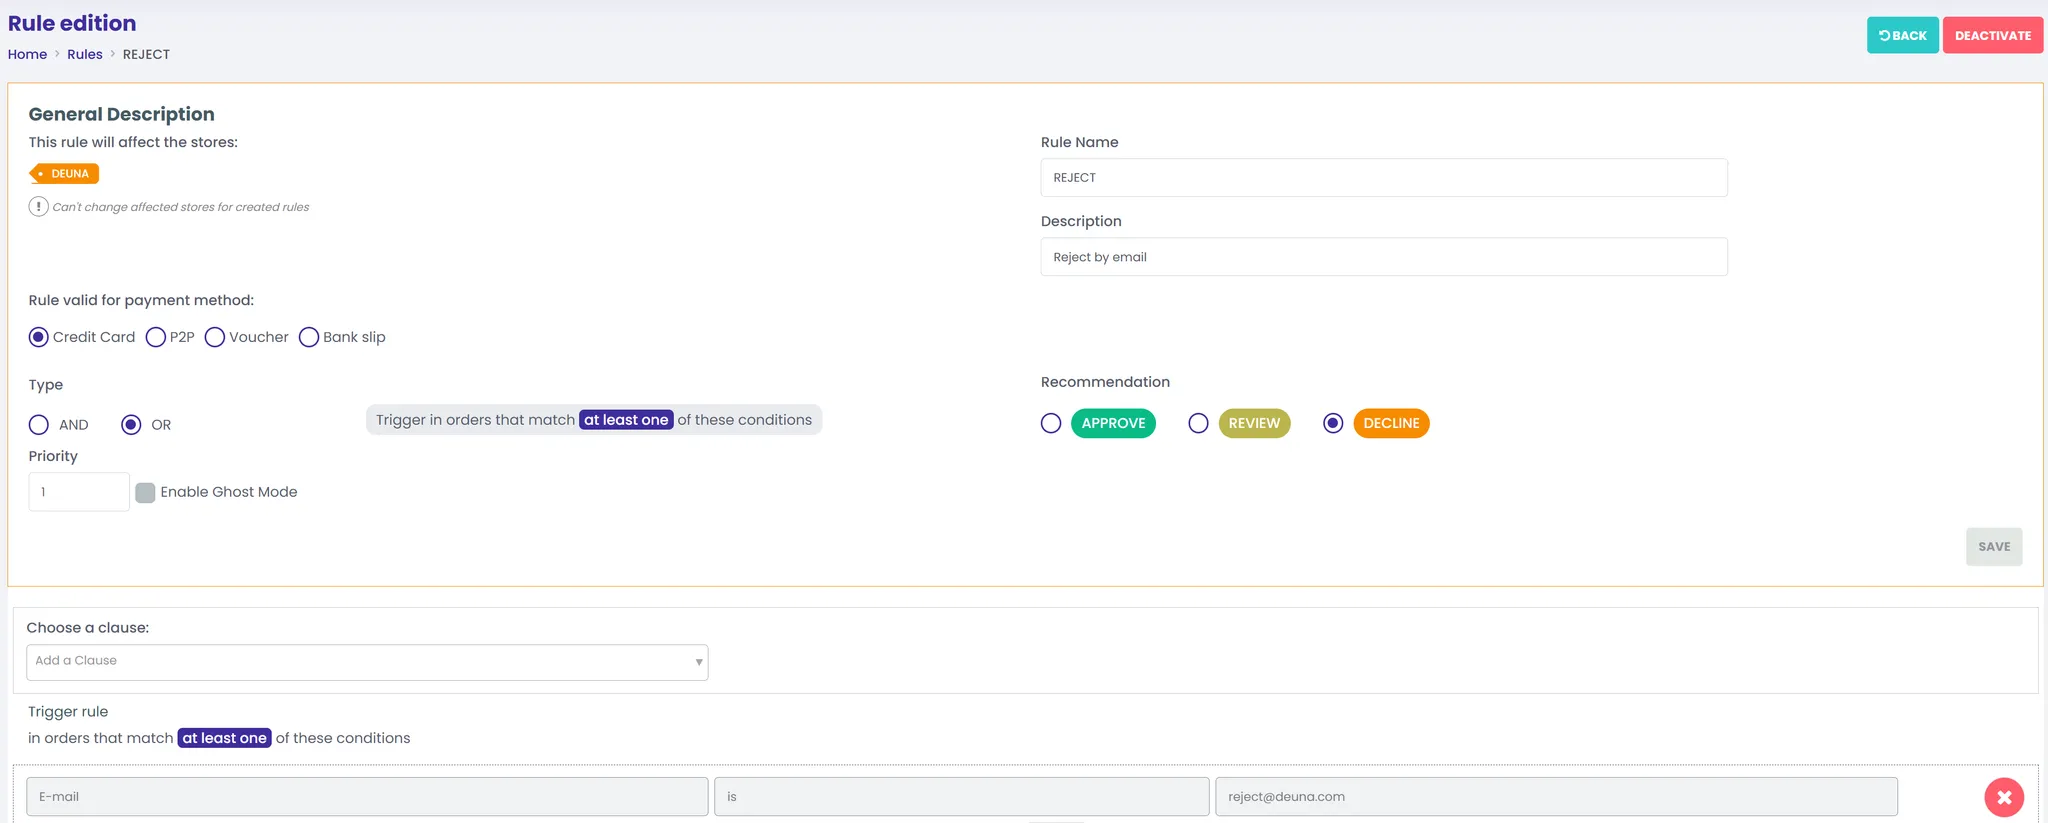
Create rules for approve, deny, and manual review
-
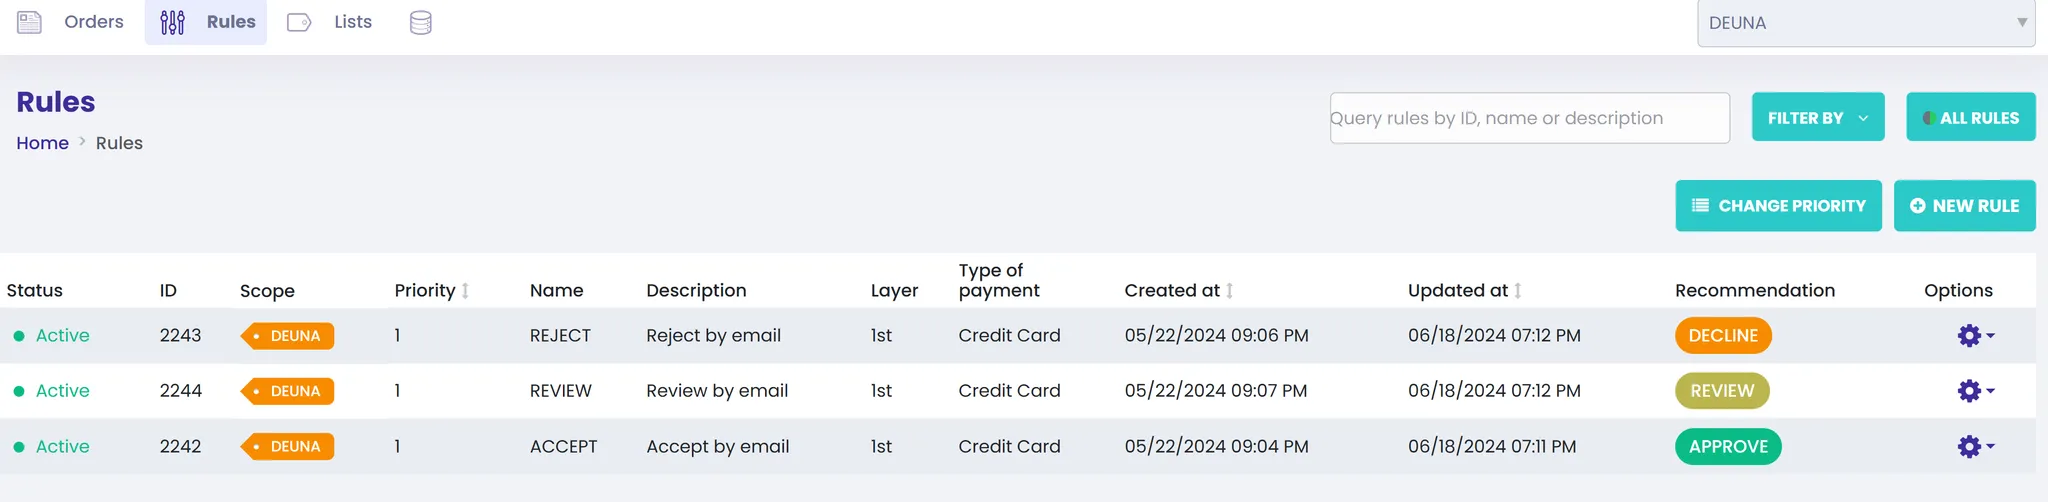
Enter to the Rules tab
-
Select “New Rule”
-
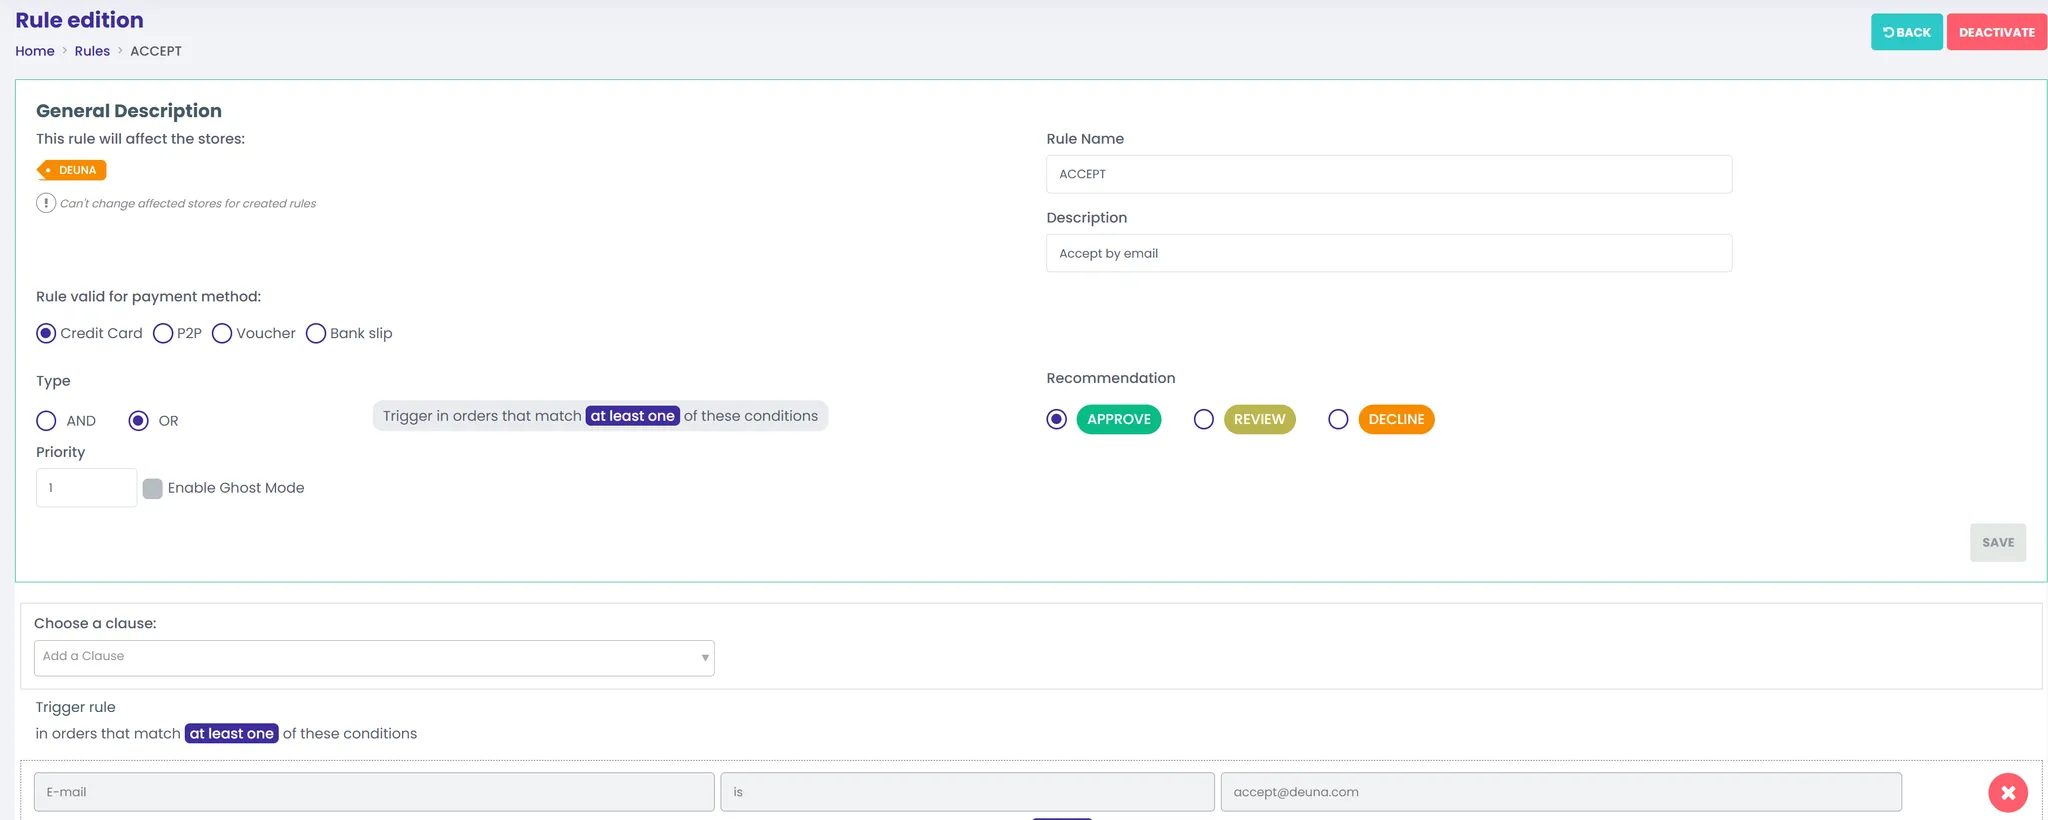
Create the Always Accept Rule with the following values
-
Create the Always Review Rule with the following values
-
Create the Always Reject Rule with the following values
-
-
Configure the webhook:
-
Select “Stores” under the user icon

-
Select the “Edit” button from your Store (should have been created by your Konduto’s KAM)

-
Select “Preferences”
- Paste https://api.stg.deuna.io/post-transactions/konduto in the textbox if the tests will be done in Deuna’s Staging Environment
- Paste https://api.sandbox.deuna.io/post-transactions/konduto in the textbox if the tests will be done in Deuna’s Sandbox Environment
- Paste https://api.deuna.io/post-transactions/konduto in the textbox if the tests will be done in Deuna’s Production Environment
- Select “Save”
-
Setup DEUNA’s Test Environment
-
Go to https://admin.deuna.io/ and enter the credentials provided by the DEUNA team.
-
Select Test Mode

-
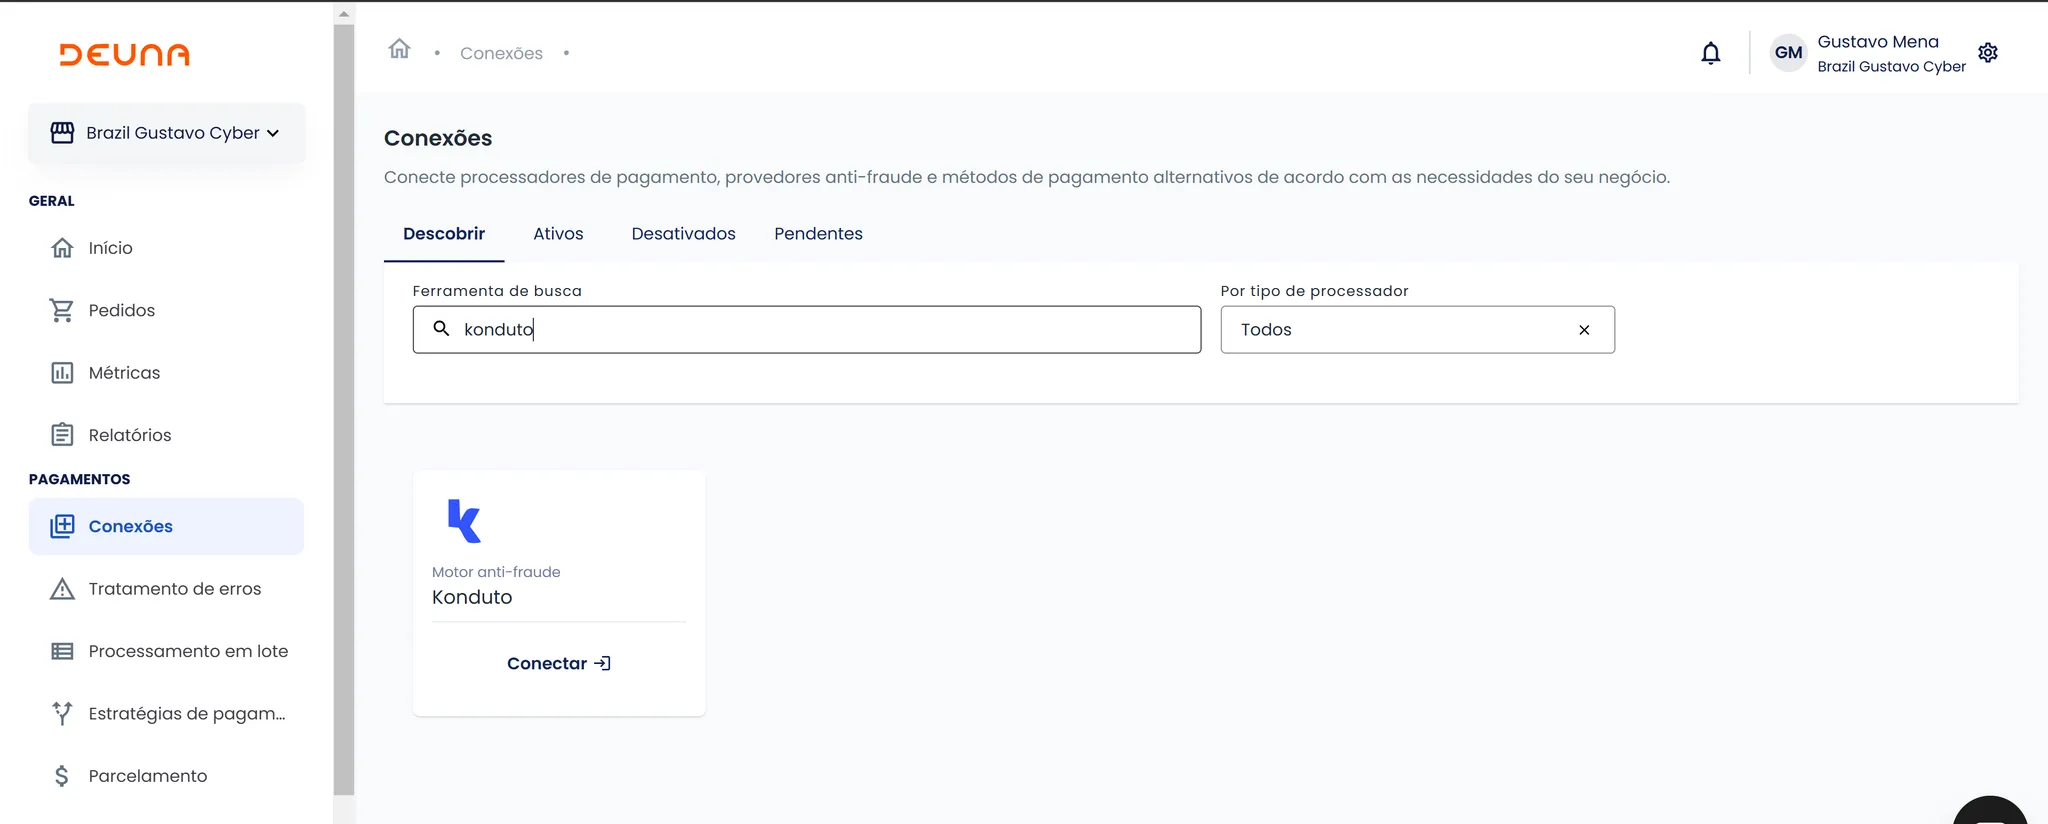
In the DEUNA admin, go to the left menu, select Payments -> Connections

-
In the search engine, type "konduto" and press the "Connect" button
-
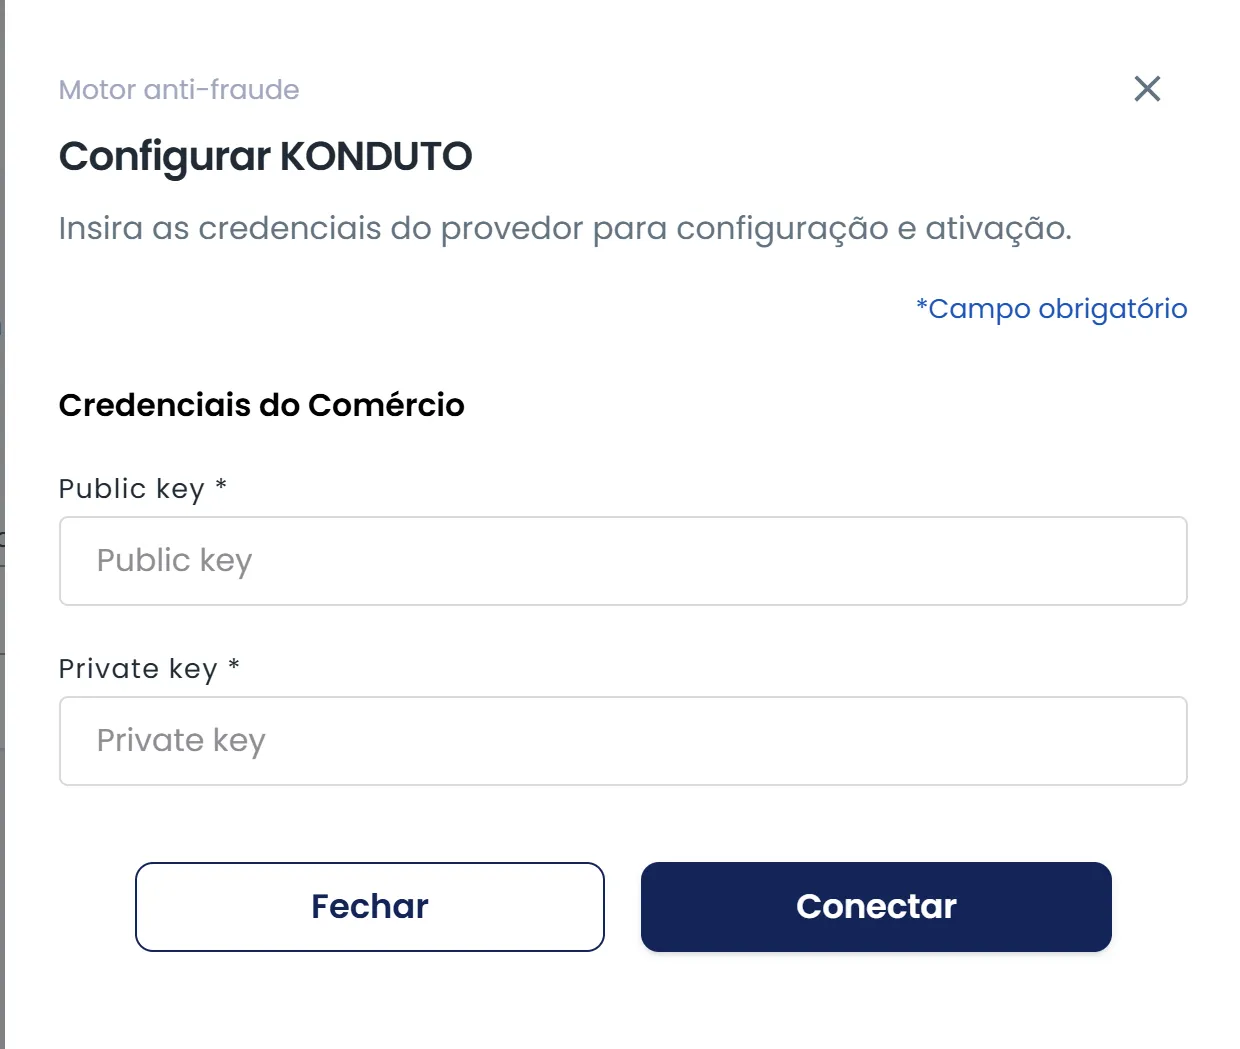
Fill out the information obtained from your Konduto Dashboard or KAM and press Connect
-
At the end of the configuration you will see a screen indicating that it has already been configured
-
Activate Manual Review
-
In the DEUNA admin, go to the left menu, select Settings -> Merchant
-
In General Fraud Settings enable both “Enable Manual Review” and “Enable Automatic Operations Execution”. Is important to have these two options enabled to allow Deuna to automatically perform the refund, capture, or void after the antifraud post authorization decision.

-
-
Configure Konduto as Post Authorization Fraud Processor
-
Even though Konduto works for both pre and post authorization, Konduto suggest to be configured Post Authorization.
-
Select Payments→ Payment Strategy
-
After selecting the Processor routing strategy, and enable the Post Authorization Fraud Analysis button
-
Select “Konduto” as Provider
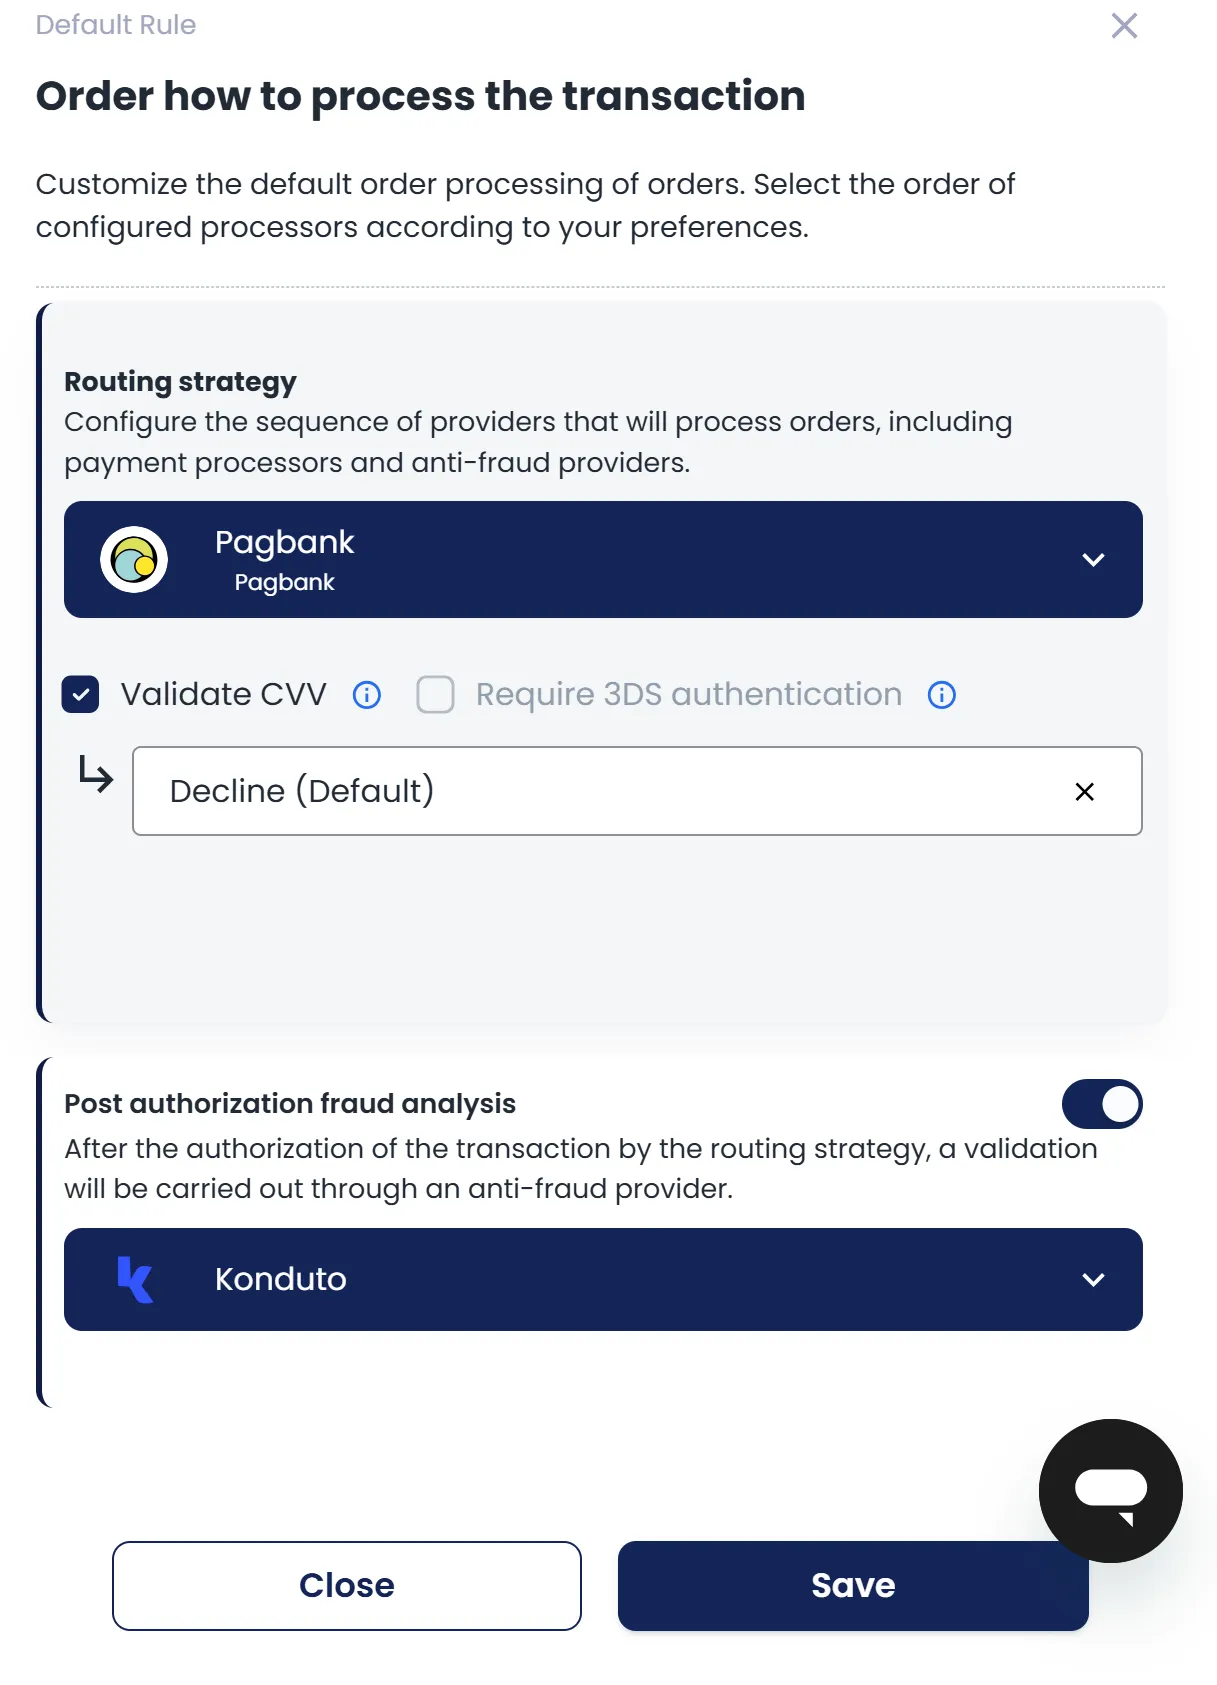
-
Select “Save”
-
Configure Device Fingerprinting in VTEX
-
Depending on your integration type you should follow one next steps in coordination with your Deuna’s TPM:
-
VTEX:
-
Enter to https://docs.deuna.com/docs/vtex-como-configurar-device-fingerprint-widget-v2 and follow the configuration steps
-
For Konduto, use the following information will be used in the object
fraudCredentials:fraudCredentials: JSON.stringify({ KONDUTO: { "publicKey": "Konduto Public Key" } }) -
The value to use is the Store’s Public Key, shared by your Konduto’s KAM or obtained in the dashboard under the Store settings in the “Keys“ tab
-
-
Direct API Integration
-
Enter to https://docs.deuna.com/docs/integrar-device-fingerprint-de-mercadopago-en-tu-comercio#cuando-el-comercio-está-integrado-a-deuna-vía-direct-api and follow the configuration steps
-
For Konduto, use the following information will be used in the object
fraudCredentials:fraudConfig: { MERCADOPAGO: {}, //example of a PSP that requires fingerprinting KONDUTO: { publicKey: "Konduto Public Key" } }, -
The value to use is the Store’s Public Key, shared by your Konduto’s KAM or obtained in the dashboard under the Store settings in the “Keys“ tab
-
-
Payment Widget not Payment Link: Currently Device fingerprint is not available for these integrations
Perform Integration Tests
-
Perform the following integration tests:
# Case Rule Use Case Acceptance requirements 1 Automatic approval Transaction with DEUNA using the email [email protected] 1. The buyer use the email [email protected]
2. Select DEUNA to make the payment.
3. Fill out the information and complete the purchase.1. The transaction is approved in DEUNA.
2. The transaction is approved in Konduto.
3. The transaction is approved in your store.2 Automatic disapproval Transaction with DEUNA using the email [email protected] 1. The buyer use the email [email protected].
2. Select DEUNA to make the payment.
3. Fill out the information and complete the purchase.1. The transaction in DEUNA is denied.
2. The transaction is denied on Konduto.
3. The transaction is disapproved in your store.3 Manual Analysis - Manually Approved Transaction with DEUNA using the email [email protected] 1.The buyer use the email [email protected].
2. Select DEUNA to make the payment.
3. Fill out the information and complete the purchase.
4. The merchant logs into their Konduto and DEUNA panel to validate the pending transaction.
5. The merchant manually approves the transaction.1. The transaction in DEUNA is approved.
2. The Konduto transaction is approved.
3. The transaction in your store is approved.4 Manual Analysis - Manually Declined Transaction with DEUNA using the email [email protected] 1.The buyer use the email [email protected].
2. Select DEUNA to make the payment.
3. Fill out the information and complete the purchase.
4. The merchant logs into their Clearsale and DEUNA panel to validate the pending transaction. 5. The merchant manually declines the transaction.1. The transaction in DEUNA is rejected.
2. The transaction on Konduto is rejected.
3. The transaction in your store is rejected.5 Manual Analysis - Keep it in Analyzing state Transaction with DEUNA using the email [email protected] 1.The buyer use the email [email protected].
2. Select DEUNA to make the payment.
3. Fill out the information and complete the purchase.1. The transaction in Konduto remains as Pending.
-
Manual Approval or Denial
-
Enter to the Konduto Dashboard https://app.konduto.com/login
-
Select the “Orders” tab
-
Select the transaction in “Pending” status
-
Find the “Pending” label and select it (Change Status)

-
From the Dropdown list select the options “Approved”, “Declined”, or in case it applies: “Fraud”, “Not Authorized”, or “Cancelled”.
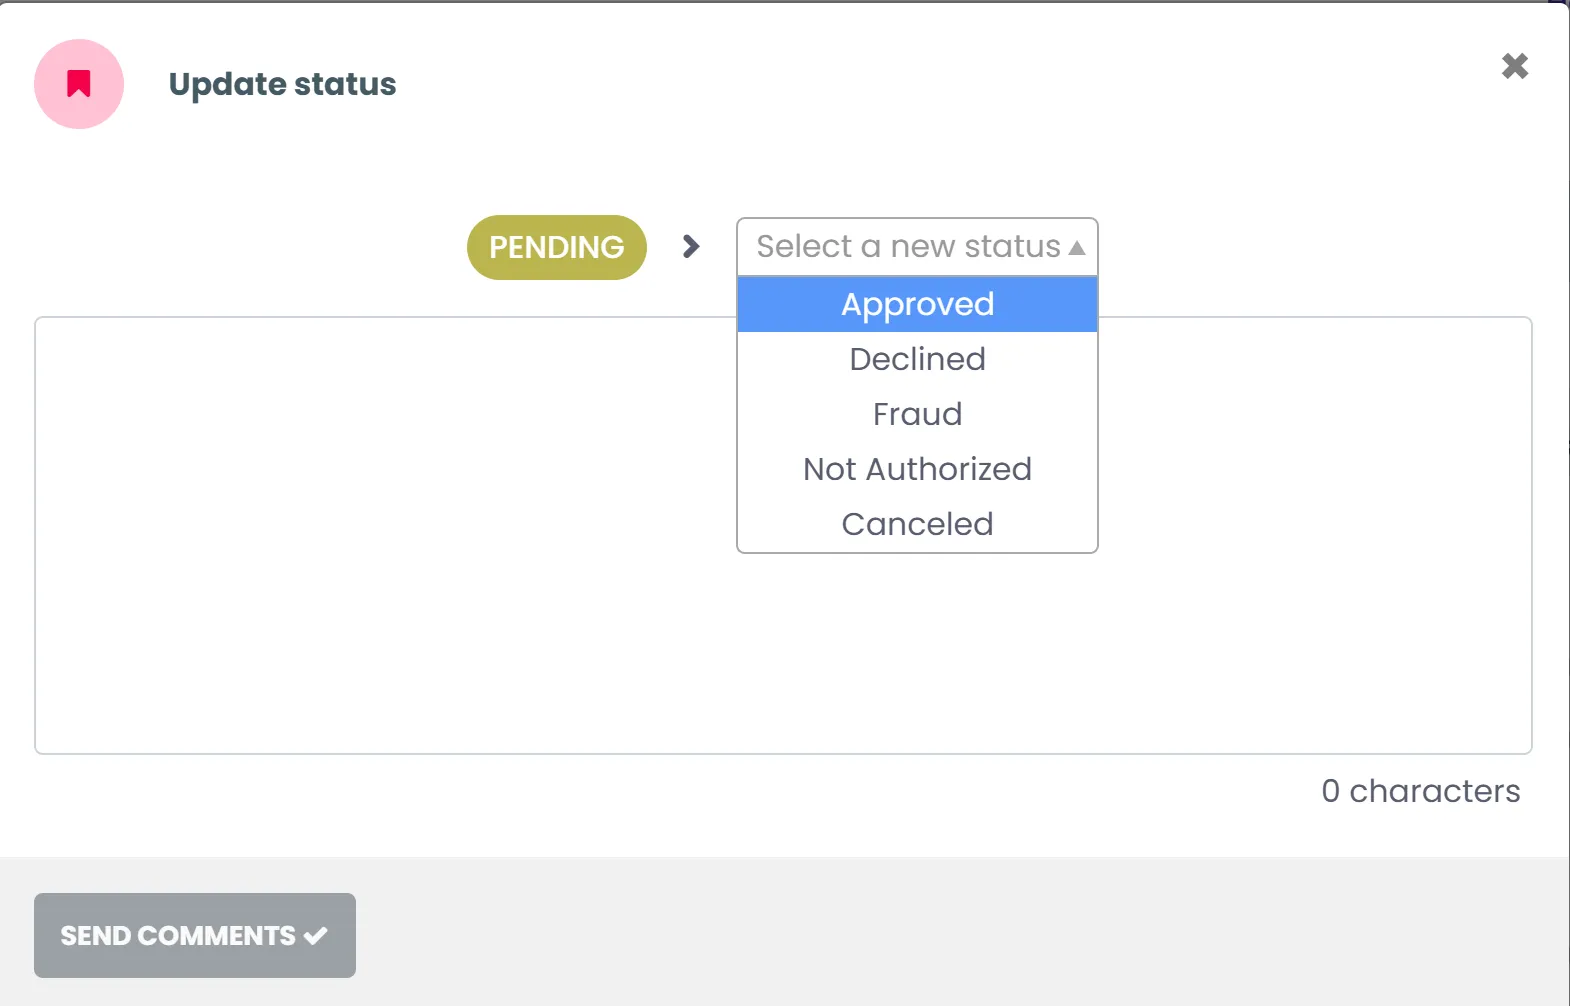
-
If desired, input comments and select “Save”.
-
Send Evidence of Testing to Konduto
-
If required, send evidence to once the tests are complete, in coordination with Deuna's TPM, send an email to Konduto with the evidence of the performed transactions.
Estimado equipo de Konduto, Adjuntamos evidencia de las pruebas con DEUNA en ambiente de pruebas: 1. Aprobación automática: 1xxxxxxx123 2. Reprobación automática: 1xxxxxxx123 3. Análisis Manual - Aprobado Manualmente: 1xxxxxxx123 4. Análisis Manual - Declinado Manualmente: 1xxxxxxx123 5. Análisis Manual - Mantenerlo en estado Pending: 1xxxxxxx123 Esperamos su confirmación para realizar la activación en producción. Saludos, -
Konduto will respond indicating that you can move forward with the process in production.
Konduto and DEUNA Certification Process in Productive Environment
Requirments
- You completed the certification in a testing environment
- Have access to a productive Konduto account (email and password)
- You have access to productive Konduto API Keys (
Public Key&Secret Key) - You have access to productive Deuna credentials
- Have a real card to take the tests
Step 1: Configure Konduto Dashboard
- Enter to https://app.konduto.com/
- Input Dashboard credentials
- Configure the webhook:
- Select “Preferences”
- Paste https://api.deuna.io/post-transactions/konduto in the textbox if the tests will be
- Select “Save”
Step 2: Configure Konduto in DEUNA
For the production environment, the process is the same for obtaining Konduto’s credentials and configuration in the DEUNA admin, but using the production URLs and credentials:
- DEUNA: https://admin.deuna.com/
- Create Konduto as Fraud Processor using the API production Credentials
- Create a Payment Strategy using Konduto as Post Auth antifraud processor
Configure Device Fingerprinting in VTEX
- Enter to https://docs.deuna.com/docs/vtex-como-configurar-device-fingerprint-widget-v2 and follow the configuration steps
- Use Konduto’s Public Key for productionin the object
fraudCredentials
Step 3: Perform productive test transactions
- Important: You must have a card available to perform productive tests.
- As in the testing process, you must send evidence to Konduto. It is recommended that you send evidence of at least three transactions to Konduto once set up and activated.
Step 4: Send evidence to Konduto of productive tests
Finally, in coordination with your Deuna’s TPM, you must send the productive transactions to Konduto in the same email to validate that everything is correct.
Updated 8 days ago