Adyen
Get started with Adyen
This page provides a comprehensive guide to successfully integrating Adyen with DEUNA.
Requirements
As stated in Payment gateways, you need to gather these requirements from Adyen:
- Existing Adyen account
- Adyen API key
- Adyen merchant account
- DEUNA processor ID
Integrate Adyen
Now that the technical requirements are set, you can start the integration.
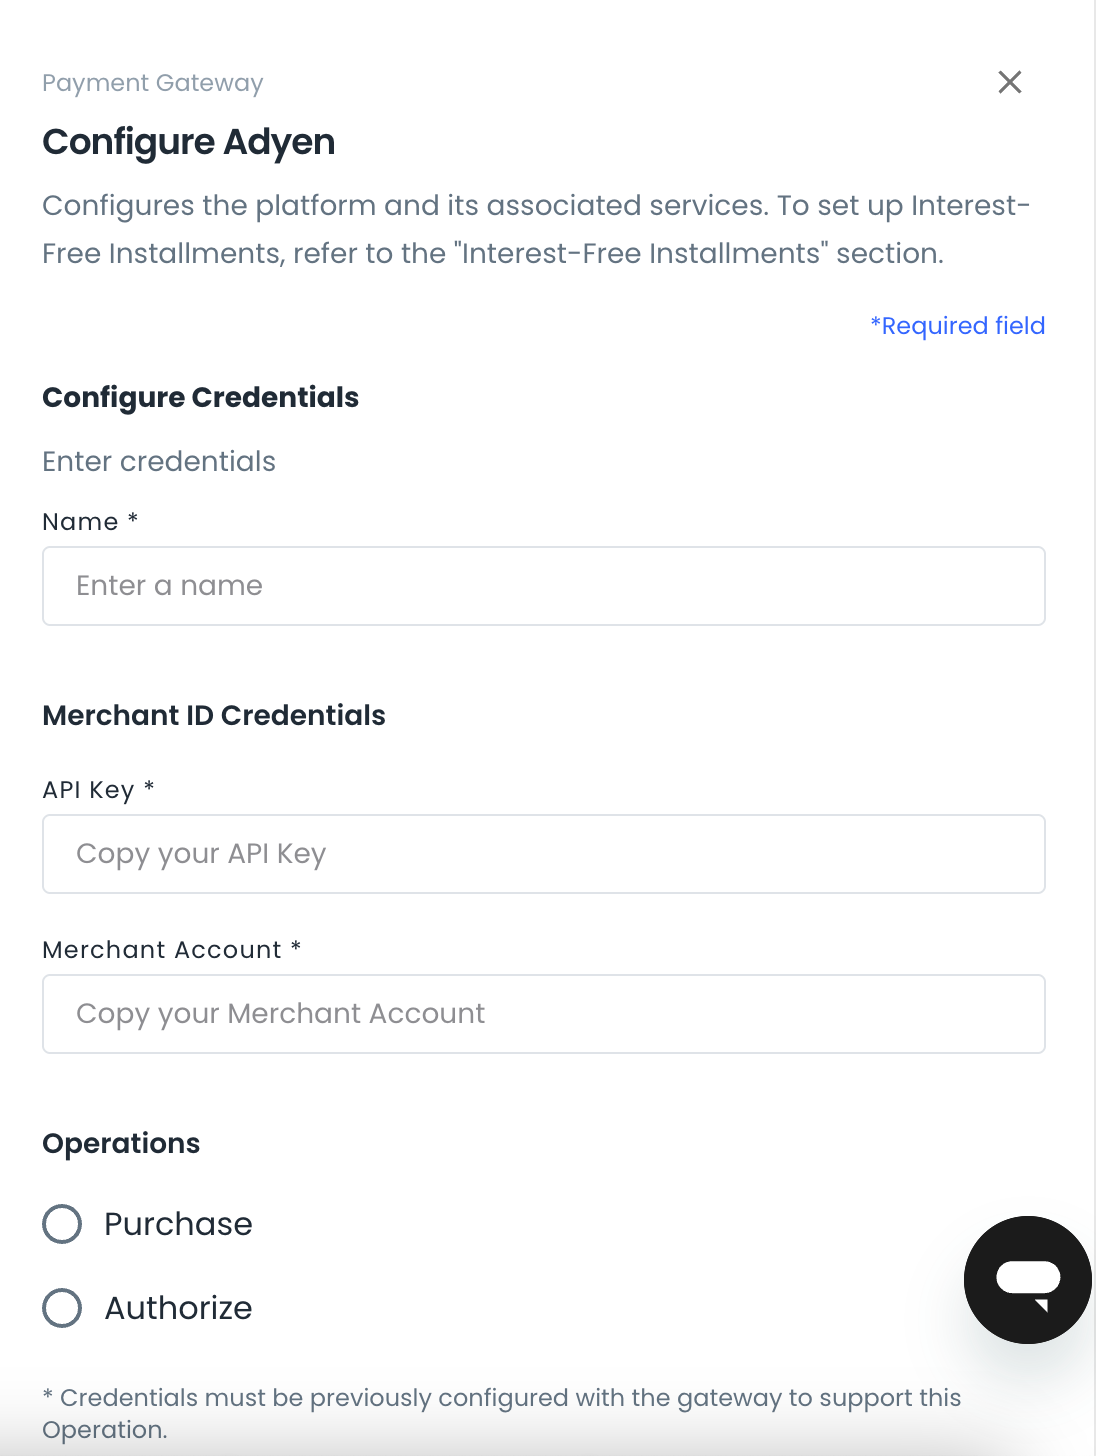
1. Enter Adyen credentials in DEUNA
Use your credentials to enable Adyen as a connection:
- Enter your credentials in the Adyen panel:
- Name: Name the configuration as you wish.
- API key: Your Adyen API key.
- Merchant account: Your Adyen merchant account.
- Choose the operation type you want to perform:
- Purchase
- Authorize
- Select if you want to accept 3DS payments.
- Click Save.
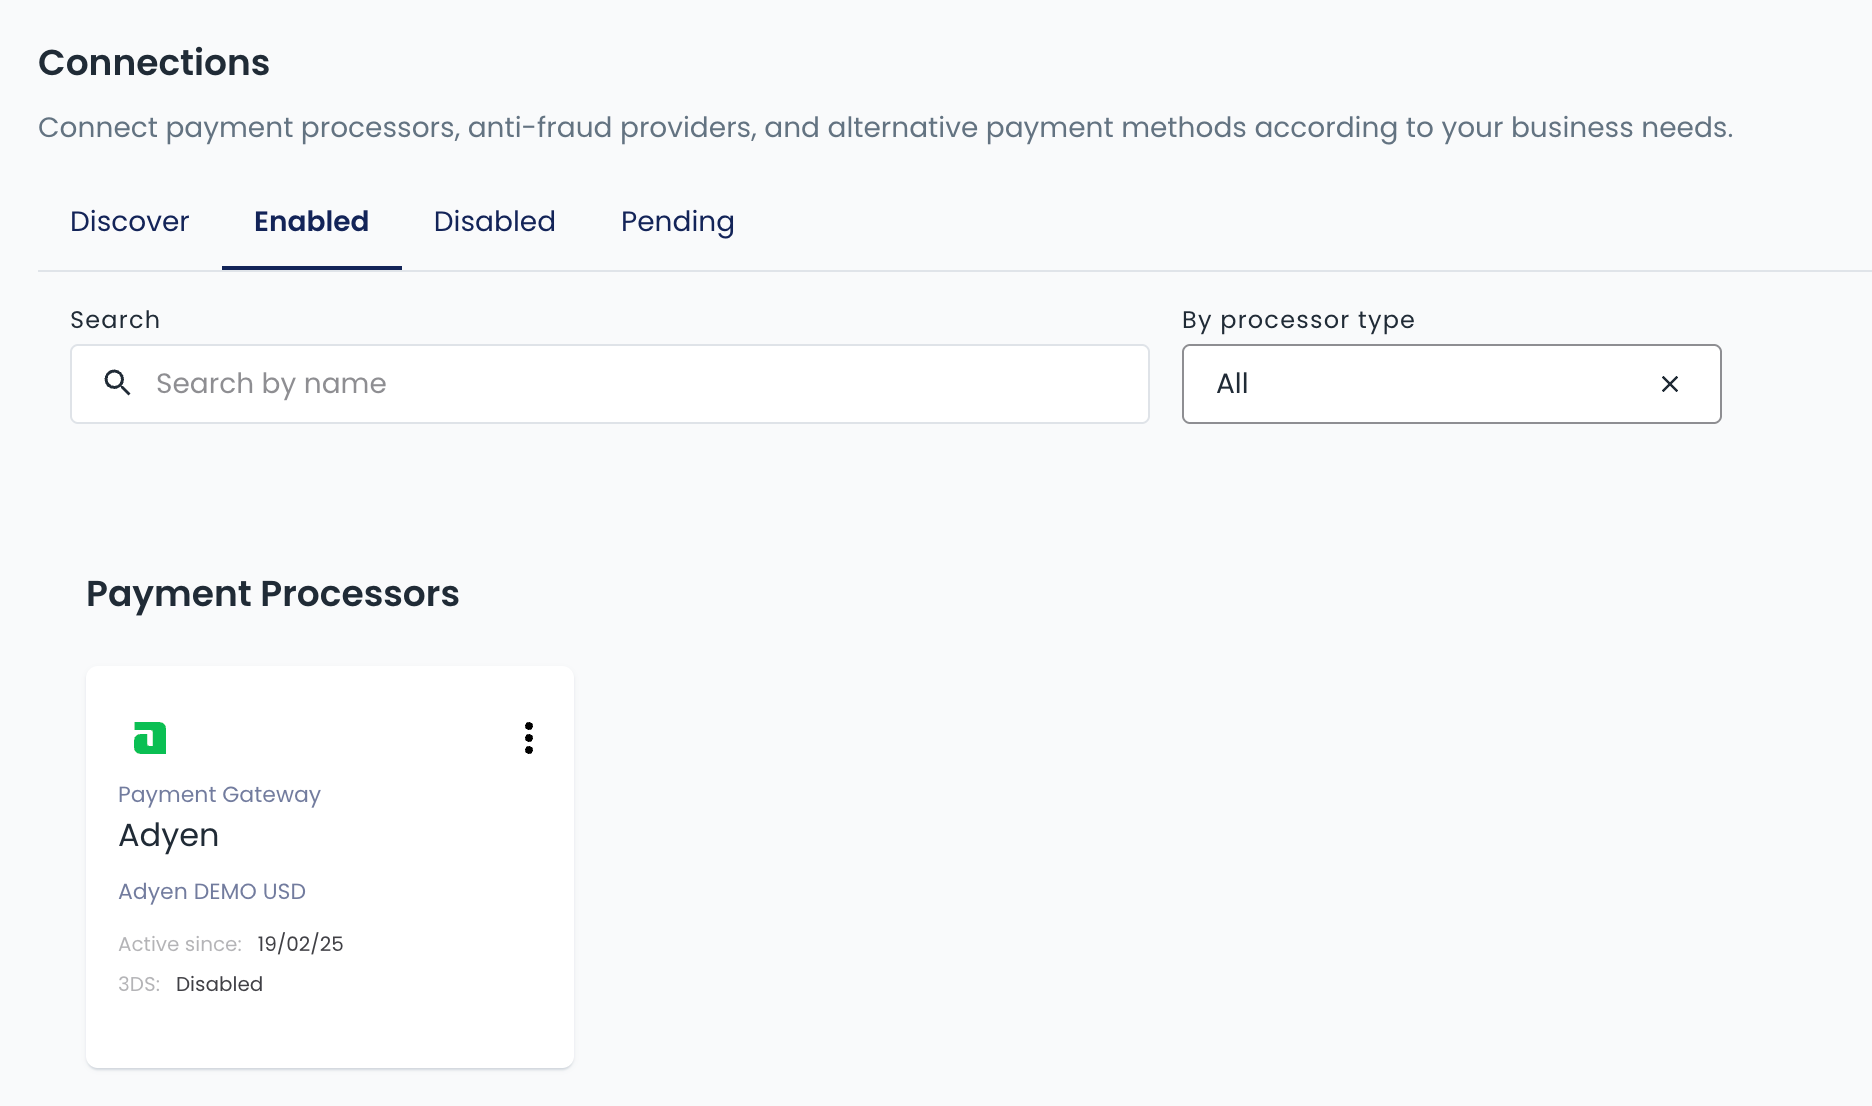
Once finished, you get a confirmation message.Adyen is set as an enabled connection.
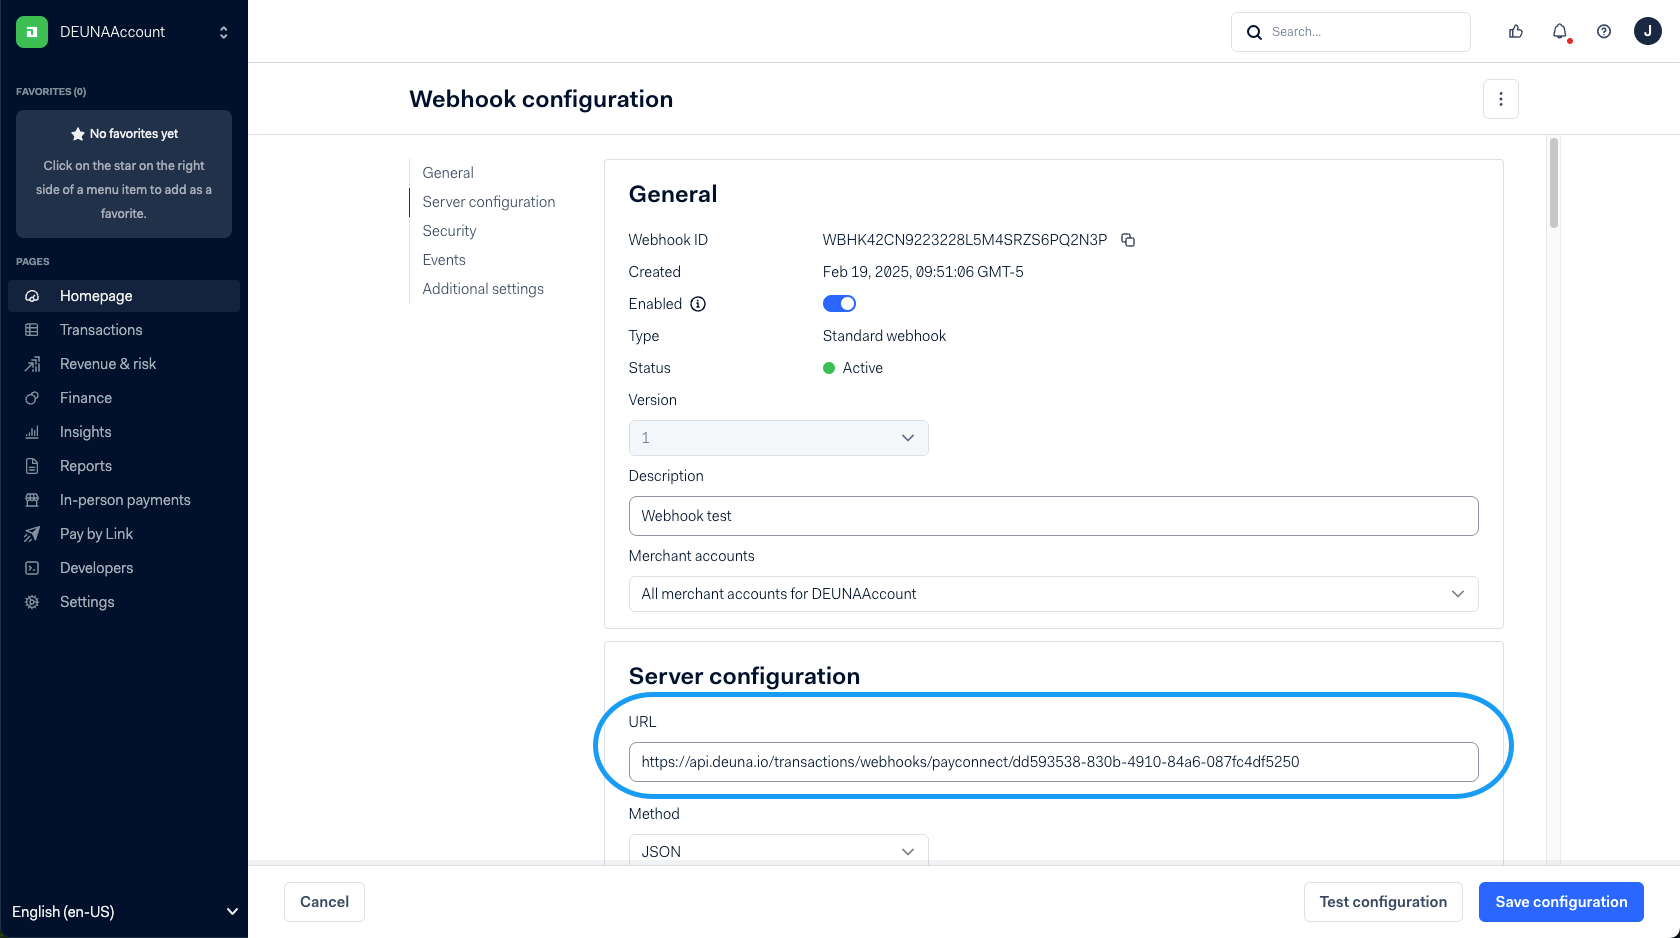
2. Configure the Adyen webhook
A processor ID is created after you enable Adyen. Request it to your DEUNA before you configure the Adyen webhook.
Each new connection in DEUNA requires a unique webhook configuration in Adyen. Repeat the steps below for each connection.
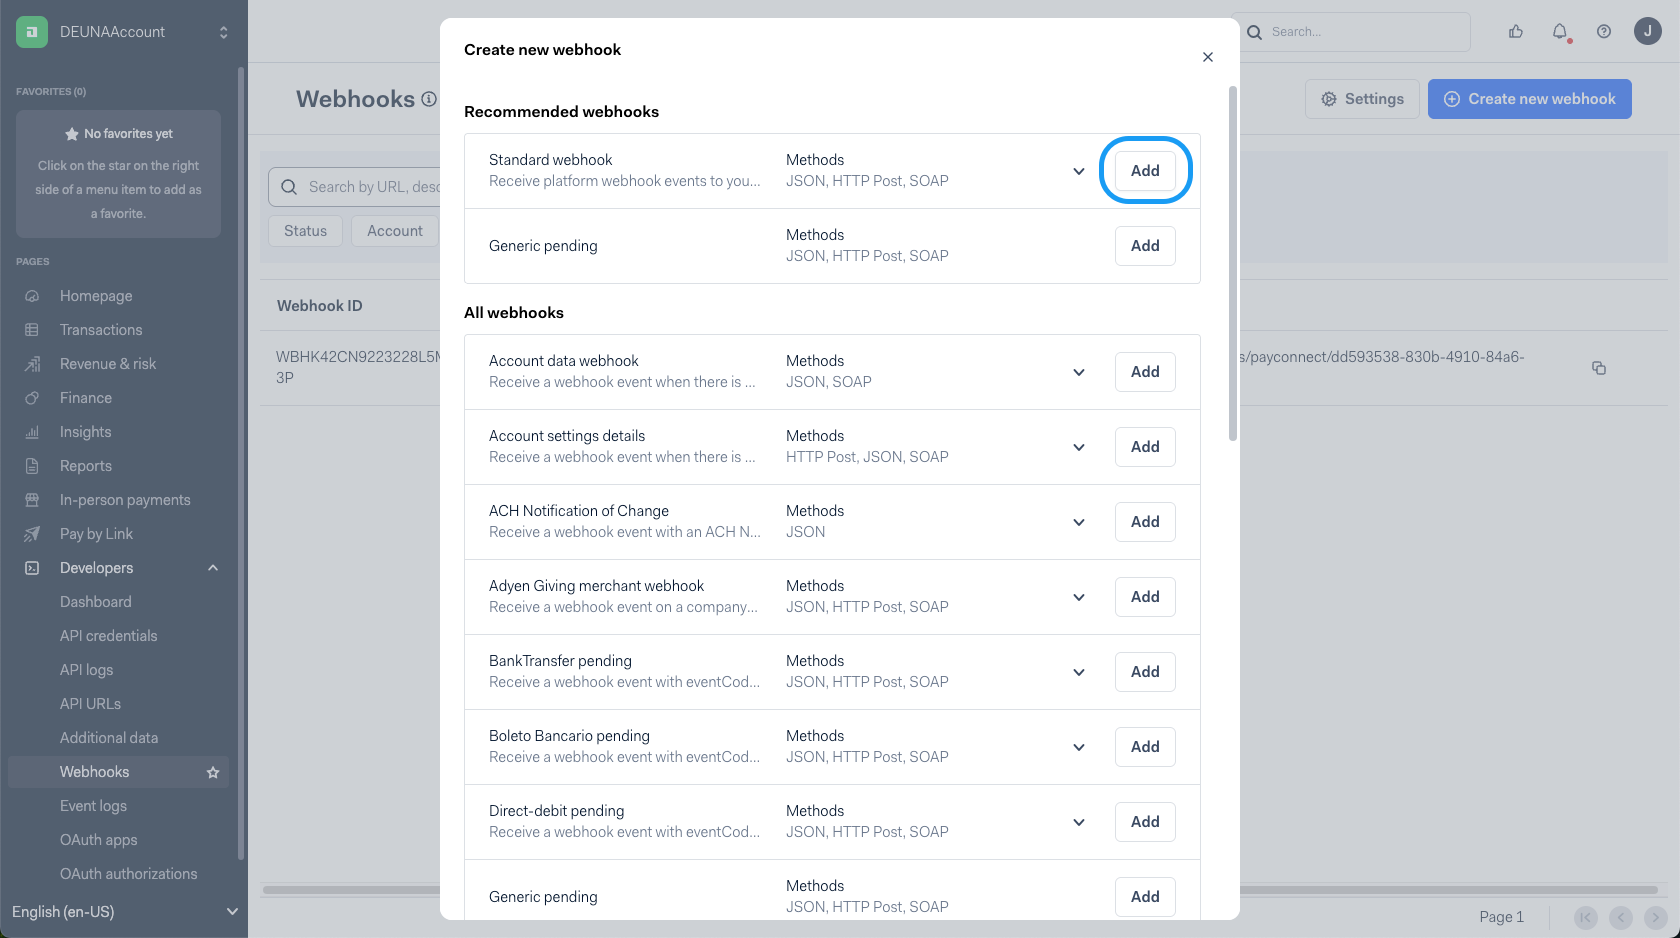
- Log in to Adyen.
- In the left panel, expand the Developers section and select Webhooks.
- Click Create new webhook.
- In the pop-up window, locate Standard webhook and click Add.
- Provide a description and enter the webhook URL with the following format:
- For testing:
https://api.sandbox.deuna.io/transactions/webhooks/payconnect/{{yourDEUNAprocessorID}} - For production:
https://api.deuna.io/transactions/webhooks/payconnect/{{yourDEUNAprocessorID}}
- For testing:
- Before saving the changes, click Test configuration.
- Select your DEUNA account as the Merchant account.
- Select the event AUTHORISATION.
- Click Test.
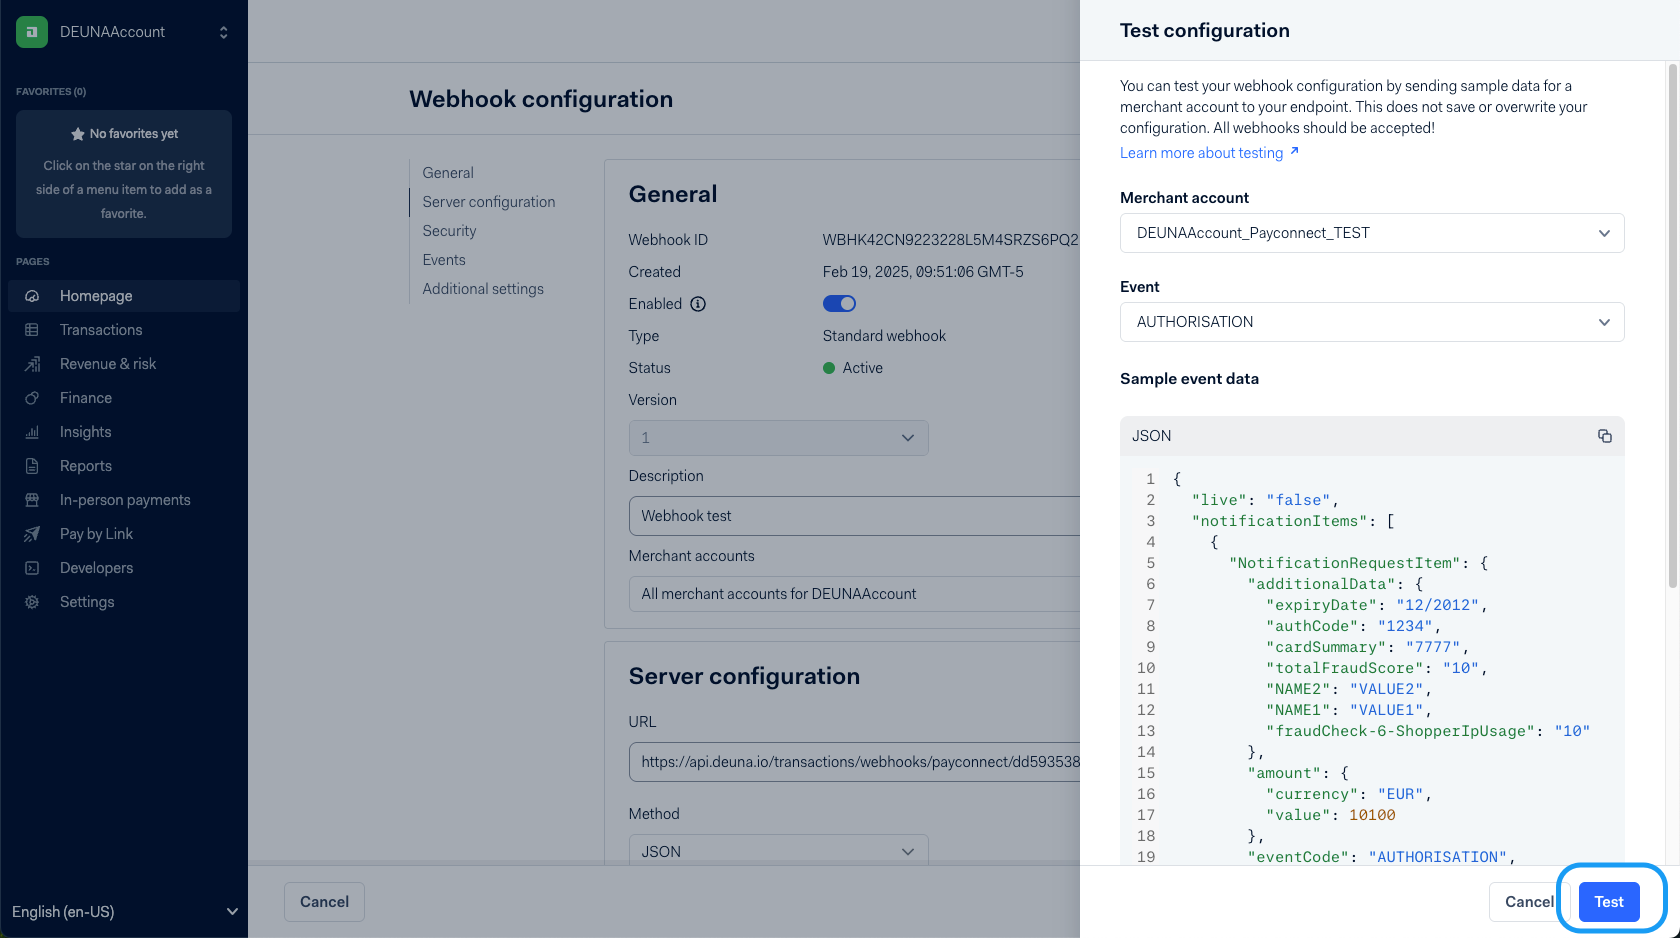
If the webhook is configured correctly, then you get a success message.
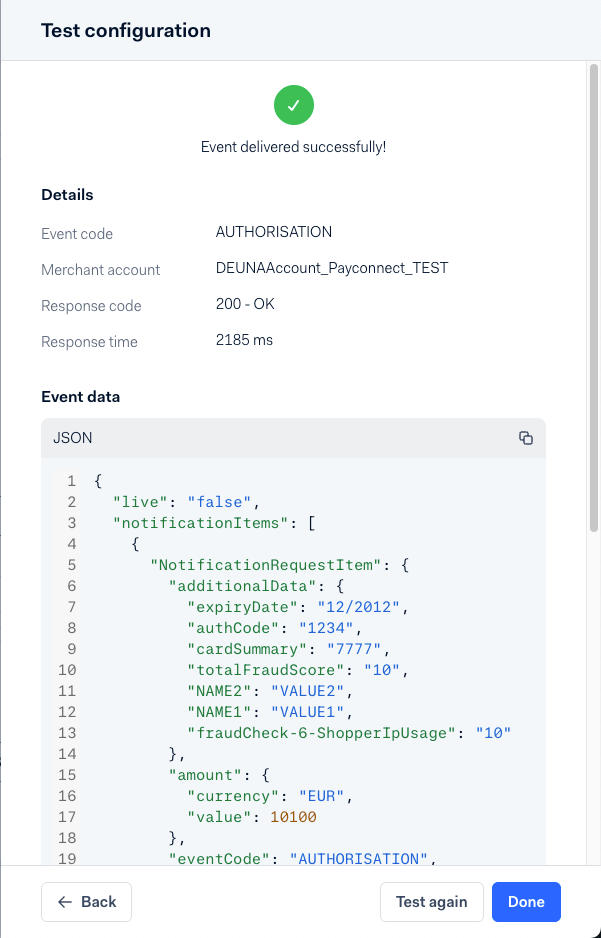
- Click Done to close the testing panel.
- Click Save configuration to finish the configuration.
From this point on, you can now make transactions with Adyen using DEUNA.