Chargebacks upload
Upload chargebacks to your anti-fraud providers in DEUNA.
How chargebacks work
Deuna enables you to upload the received chargebacks via email or SFTP, and automatically forward them to their anti-fraud providers. This improves overall performance as this feedback is the primary way to train the system’s machine learning models.
Without this feedback, the system will never learn from its mistakes and will continue to approve similar fraudulent transactions.
Improve antifraud results
Learn how chargebacks improve your anti-fraud strategy.
Corrects "False Negatives"
The model's main job is to score transactions.
A chargeback is the most definitive signal of a "false negative"— a transaction the model incorrectly scored as "safe" when it was actually fraudulent.
By uploading this data, the model learns to identify the subtle patterns it missed.
Powers Pattern Recognition
The anti-fraud model analyzes thousands of data points.
When it receives a chargeback, it re-evaluates all the data associated with that failed transaction:
- What email address was used?
- What device fingerprint?
- What was the shipping address?
- What was the time of day?
The model can now find new, hidden patterns. For example, it might learn that transactions from a specific IP range using a new email and buying digital goods are suddenly much riskier than it originally thought.
Enables Link Analysis
Fraudsters often reuse emails, devices, or shipping addresses.
When you upload a chargeback, the provider links that fraud to every data point in the transaction.
- Before: The fraudster's device (
Device_XYZ) was seen as safe. - After: You upload a chargeback for that transaction.
Device_XYZis now flagged as high-risk. - Result: The next time any transaction comes from
Device_XYZ.
The system will instantly flag it as high-risk or block it, preventing future fraud from that person.
Keeps the Model Up-to-Date
Fraud tactics change constantly. The patterns that worked for fraudsters last month will be different next month.
Uploading chargebacks the closest to real-time is the only way to ensure the machine learning model is adapting to these new tactics as fast as they appear.
In short, uploading chargebacks is not just an administrative task; it is the core of the machine learning process.
It's how you actively teach the system to get smarter and stop losing your money, and DEUNA helps you in this journey.
Required chargeback information
The following information is required per chargeback event to properly feed back to the anti-fraud providers:
| Field | Description | Format/validation | Mandatory |
|---|---|---|---|
transaction_id | DEUNA transactio id. Key for the chargeback database, cannot have an empty value. | Must be present in DEUNA's system | Yes |
external_id | Id of the record in the merchant’s system. Useful for the merchant to match this record quickly to their own system. | AN(50) | No |
chargeback_identifier | The chargeback unique identifier as received from the gateway/acquirer on the chargeback's notice. | AN, restricted to open won or lost (10) | No |
chargeback_status | Status of the chargeback. It can be open, won, and lost. | AN(50) | No |
chargeback_reason_code | Chargeback reason code from the PSP. | AN(50) | No |
chargeback_case_id | Dispute identifier as defined by the issuer/gateway. | AN(50) | No |
merchant_chargeback_id | Chargeback Identifier in merchant’s system. | AN(50) | No |
chargeback_amount | The amount disputed in the chargeback in cents | N(10) | No |
chargeback_date | Date when the chargeback was first informed. | Date (YYYY-MM-DDT0000:00Z | Yes |
detail | Any further detail available about the chargeback | String (2500) | No |
Chargeback options
Deuna offers two options depending on the merchants requirements, timing, and environment:
- Send the chargebacks in a CSV file to
[[email protected]](mailto:[email protected])-
Only for Production transactions.
-
The CSV file name must be in the format UUID-DDMMAA.csv
- Deuna' s merchant ID (UUID): 37e21ead-3951-4cbc-b075-9c635f4b8933
- Date in DDMMAA: 051225
- Example:
37e21ead-3951-4cbc-b075-9c635f4b8933-051225.csv
-
The data format should be as follows
transaction_id external_id chargeback_identifier chargeback_status chargeback_reason_code chargeback_case_id merchant_chargeback_id chargeback_amount detail chargeback_date a596f725-e22b-411f-ac51-c94b2386b39b merchant_test_5 chargeback_test_5 open 0003 cbk_test_5 merchant_cbk_test_5 2000 En proceso judicial 2025-10-30T11:20:00Z d3daecd7-6f3a-4cb4-98a8-c077cfd5b9d9 merchant_test_6 chargeback_test_6 lost 4837 cbk_test_6 merchant_cbk_test_6 550 Goods/Services not received 2025-10-30T11:21:00Z
-
- Send the chargebacks in a JSON format via SFTP following this guide. (Link to “SFTP Upload Guide”)
- For either Sandbox and Production transactions.
- Chargebacks are sent instantly to the antifraud provider.
Requisites
To complete this process, you need the following information:
- Your Merchant ID (provided by DEUNA)
- Your SSH private key for authentication (explained below)
- The JSON file you want to upload
Upload a SFTP file
Upload chargebacks to our SFTP servers.
1. Create the SSH Key
Generate your computer Key
-
Open Terminal App (Windows 10, Windows 11)
-
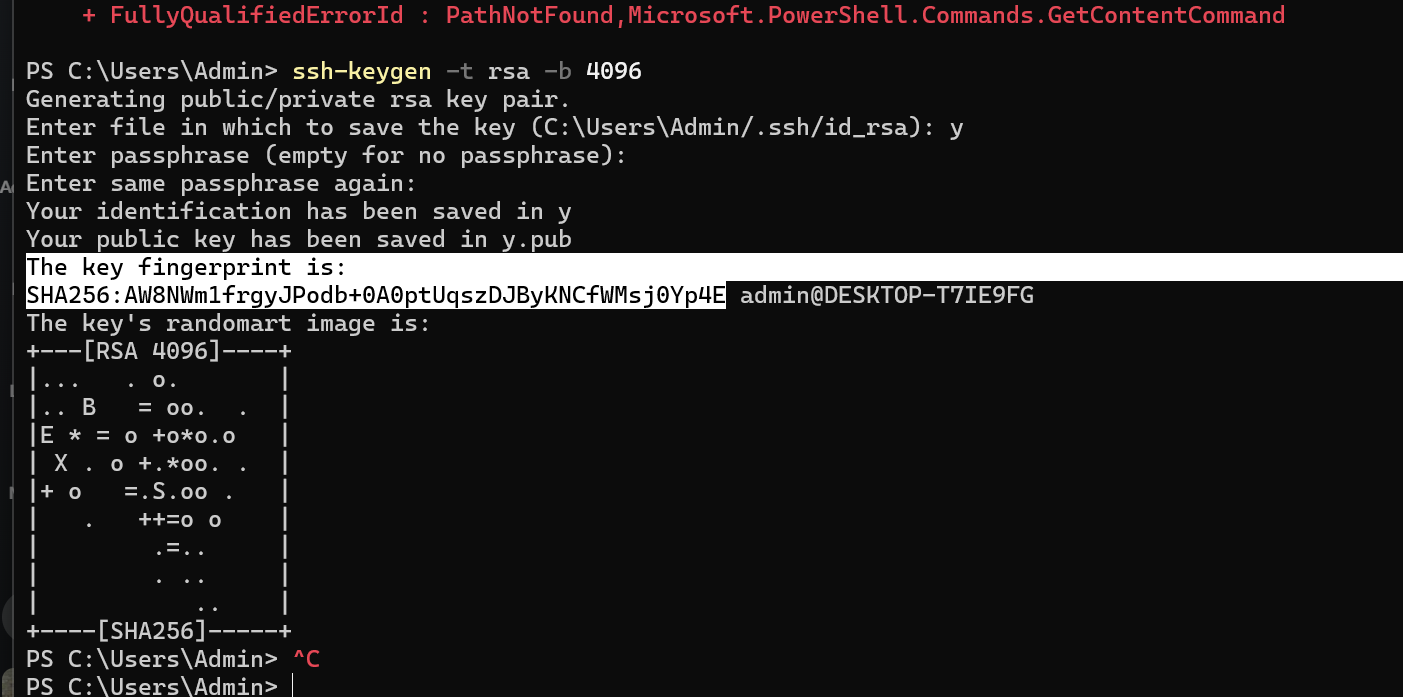
Run the command
ssh-keygen -t rsa -b 4096 -
Enter a passkey (suggested 4 or 6-digit numeric Pin) when asked for passphrase and press Enter (Hint: it won’t show the keys that you are pressing)
-
Enter again your passkey and press Enter
-
You will see the key confirmation like the following image
- Obtain your SSH Key by entering
cat ~/.ssh/id_rsa.pub, you will receive a response with the key like the following example:

2. Register the SSH key to DEUNA
Register your computer Key with Deuna
- Copy you SSH Key
- Share it with your DEUNA TPM:
ssh-rsa AAAAB3NzaC1yc2EAAAADAQABAAACAQC8YDqXwxnvJkXOK5Dne0Fzcmt/f5MlD5WpcICgJxVtOYYGP1M+zn+Z2e3EHcssxblOPykFmBax/WBtVbcgtxUxMypTUMqsKtUtbg9D9DSMIKPbk7+BpQpG1dAx/SPmK7v/Zq0tUdw5np8z3KFnyH7q1Bw4NFd9jk48/CqOftEJn28lprJRus8/K8Jy+3S2vyTl2g8YuVHYvznl59aVKKCtm//D79OjPKKsdN3upCN6mo8FTCf0Ku+KS/F6kCIXn/gwKtRNuMwffJq+g7/qaMmo3FGBiaw9DCTbL5D+INgvAlbfpruqOa7GsmPreq7371+Om5BsQz2I79WvJtbPwrv+YrbOm2FVaaeKg4LKs8uqlcgs/DXaRBNtdQLQVGND37dvxVNc6ZsFagdQF+OKRxPc5MsIwDZH1Fd6m9qAN/Vxgfl8a5gg57ovkd2yJC40Blmn1nRAFxTdVceV+9c0a6qG7RTMyli9se8PzSS4Ckk/IL5TBzzNyimDYYtQWZ7INPNiFxRUKBTAeqwI+5Xava2hWHA35WmPh+5kl/J9gS3noALSBe/DT4ie9IXP68r7Ril2vPkvY8ONIc2usTsyIRmVCIss3Ww7ekMYwfpx/D8lroWoqC8Go6eI5lMCKYXkkzz0nsWwASTVG8jhbDWs7sebxzX5EmWup3Rf/0fokJfN9w== admin@DESKTOP-T7IE9FG
Once registered, the key will be stored in your computer and no further steps will be required regarding key generation and registration.
3. Connect to DEUNA SFTP server
-
Open the Terminal App
-
Sandbox Environment
- Enter the following command
sftp -i ~/.ssh/id_rsa [email protected]
- Enter the following command
-
Production Environment
- Enter the following command
sftp -i ~/.ssh/id_rsa [email protected]
- Enter the following command
-
You will receive the following response with the question
Are you sure you want to continue connecting (yes/no/[fingerprint])?:

- Press
yesand enter - You will be asked the following:
Enter passphrase for key 'C:\Users\Admin/.ssh/id_rsa’ - Enter your passkey and press enter
- You will receive the confirmation
Connected to [transfer-sftp.chargebacks.sandbox.deuna.io](http://transfer-sftp.chargebacks.sandbox.deuna.io/)

4. Create a JSON file with the chargeback entries
-
The Json file must have the following structure (example for two entries)
{ "version" : "1.0", "records" : [ { "transaction_id": "a596f725-e22b-411f-ac51-c94b2386b39b", "external_id" : "merchant_test_5", "chargeback_identifier":"chargeback_test_5", "chargeback_status": "open" , "chargeback_reason_code": "0003", "chargeback_case_id": "cbk_test_5", "merchant_chargeback_id": "merchant_cbk_test_5", "chargeback_amount": 2000, "detail": "En proceso judicial", "chargeback_date": "2025-10-30T11:20:00Z" }, { "transaction_id": "d3daecd7-6f3a-4cb4-98a8-c077cfd5b9d9", "external_id" : "merchant_test_6", "chargeback_identifier":"chargeback_test_6", "chargeback_status": "lost", "chargeback_reason_code": "4837", "chargeback_case_id": "cbk_test_6", "merchant_chargeback_id": "merchant_cbk_test_6", "chargeback_amount": 550, "detail": "Goods/Services not received", "chargeback_date": "2025-10-30T11:21:00Z" } ] } -
The body is composed by a field named
versionwith the constant value1.0, followed by an array namedrecords. -
Each object inside the records array, contains a chargeback entry, which must have the following structure:
| Field | Description | Format/validation | Mandatory |
|---|---|---|---|
transaction_id | DEUNA Transaction ID. Key for the chargeback database, cannot have an empty value | Must be present in Deuna System | Yes |
external_id | Id of the record in the merchant’s system. Useful for the merchant to match this record quickly to their own system. | AN (50) | No |
chargeback_identifier | The chargeback unique identifier as received from the gateway/acquirer on the chargeback's notice. | AN (50) | No |
chargeback_status | Status of the chargeback. It can be open, won, and lost. | AN, restricted to open won or lost (10) | No |
chargeback_reason_code | Chargeback reason code from the PSP** | AN (20) | No |
chargeback_case_id | Dispute identifier as defined by the issuer/gateway. | AN (50) | No |
merchant_chargeback_id | Chargeback Identifier in merchant’s system. | AN (50) | No |
chargeback_amount | The amount disputed in the chargeback in cents. In case no value is defined, the process should consider the initial transaction amount as chargeback. | N (10) | No |
chargeback_date | Date when the chargeback was first informed | Date (YYYY-MM-DDT0000:00Z | Yes |
detail | Any further detail available about the chargeback | String (2500) | No |
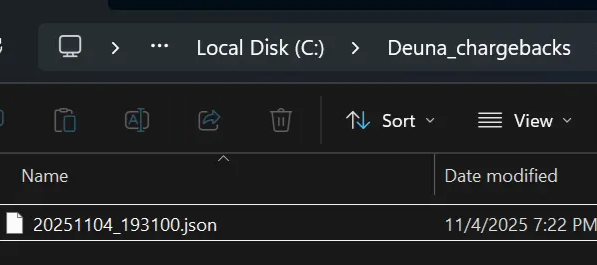
- Save the file with a TIMESTAMP as its name YYYYMMDD_HHMMSS.json. Example
20251104_193100.json - Store it in a folder with ease of access in your hard drive, suggested:
C:\Deuna_chargebacks\
5. Test the SFTP connection
Send the file using the SFTP connection in the Sandbox environment
-
Navigate to Sandbox environment:
cd /deuna-chargebacks-sbx -
Enter the command to upload the file in the SFTP server directory for the selected environment:
put {{route/to/file/in/pc-local}}/{{chargeback file name}} inbound/merchants/{{merchant_id}} -
Example:
put C:\Deuna_chargebacks\20251104_193100.json inbound/merchants/38696c00-9b00-4be9-84bc-60e7d7a7ba57 -
You will receive a message with the progress and results

- In case you receive the message
Couldn’t send packet: Broken pipe, you should reconnect to the SFTP with the commandsftp -i ~/.ssh/id_rsa [[email protected]](mailto:[email protected])and enter your passkey as the passphrase for key, and then retry to upload the file using starting from point 1 - Disconnect with the command
bye.
6. See the test results file
If needed, you can download a results file with the following steps:
- Connect again to the SFTP server with the command
sftp -i ~/.ssh/id_rsa [email protected]and enter the passphrase1234 - Navigate to the sandbox environment:
cd /deuna-chargebacks-sbx - Navigate to the outbount merchant folder with the command
cd /outbound/merchants/{{merchant_id}} - Example
cd /outbound/merchants/38696c00-9b00-4be9-84bc-60e7d7a7ba57 - Enter
get YYYYMMDD_HHMMSS_output.json, whereYYYYMMDD_HHMMSSis the timestamp of the chargeback file uploaded previously. - The file will be downloaded to the folder where the chargeback file is located
- Example
get 20251104_193100_output.json - Complementary, you can add a specific location to download the file as well:
get YYYYMMDD_HHMMSS_output.json /path/to/local/destination/
7. Send the file to Production
Send the file using the SFTP connection in Production environment
-
Enter the command to upload the file in the SFTP server directory for the selected environment
put {{route/to/file/in/pc-local}}/{{chargeback file name}} inbound/merchants/{{merchant_id}} -
Example:
put C:\Deuna_chargebacks\20251104_193100.json inbound/merchants/38696c00-9b00-4be9-84bc-60e7d7a7ba57 -
You will receive a message with the progress and results

-
In case you receive the message
Couldn’t send packet: Broken pipe, you should reconnect to the SFTP with the commandsftp -i ~/.ssh/id_rsa [email protected]and enter1234as the passphrase for key, and then retry to upload the file using starting from point 1 -
Disconnect with the command
bye
8. See the production results file
If needed, you can download a results file:
- Connect again to the SFTP server with the command
sftp -i ~/.ssh/id_rsa [email protected]and enter the passphrase1234 - Navigate to the outbount merchant folder with the command
cd /outbound/merchants/{{merchant_id}} - Example
cd /outbound/merchants/38696c00-9b00-4be9-84bc-60e7d7a7ba57 - Enter
get YYYYMMDD_HHMMSS_output.json, whereYYYYMMDD_HHMMSSis the timestamp of the chargeback file uploaded previously. - The file will be downloaded to the folder where the chargeback file is located
- Example
get 20251104_193100_output.json - Complementary, you can add a specific location to download the file as well:
get YYYYMMDD_HHMMSS_output.json /path/to/local/destination/
Troubleshooting
Learn hoe to troubleshoot any issues.
Connection refused
If you have problems with connections, do as following:
- Verify your private key has the correct permissions:
chmod 600 /path/to/private_key - Ensure you're using the correct private key file
- Confirm your IP address is whitelisted (contact support if needed)
Permission denied
If you have problems with premissions, do as following
- Verify you're using the correct Merchant ID
- Ensure your account has upload permissions for this directory
- Contact support if the issue persists
File already exists
If you get file errors, do as following
- Use a unique timestamp for each upload
- Check the directory with
lsbefore uploading
Result file not found
If you have problems with file finding, do as following
- Allow sufficient time for processing (typical processing time: [specify your SLA])
- Verify you're checking the correct outbound directory for your Merchant ID
- Ensure the input filename matches exactly (timestamps must match)
- Contact support if the file doesn't appear within the expected timeframe
Cannot download result file
If you have problems with file downloads, do as following
- Verify you have read permissions on the outbound directory
- Check that you're using the exact filename including the
_output.jsonsuffix - Ensure sufficient local disk space for the download
Support
If you encounter any issues or have questions:
- Email: [email protected]
- Include your Merchant ID and a description of the issue
Security best practices
Keep in mind the following security practices:
- Keep your private key secure and never share it
- Use strong file permissions on your private key (
chmod 600) - Only upload files during your scheduled processing windows
- Verify file contents before uploading to production
Updated 6 months ago